Progress Photos: Visual Proof of Your Transformation
Using a dedicated camera overlay tool makes progress photo tracking much more accurate by ensuring identical alignment.
The mirror lies. When you see yourself every day, the gradual changes happening in your body become invisible. You might feel like you are working hard but getting nowhere. Progress photos reveal the transformation you are living but cannot see.
The scale only tells part of the story. It cannot tell the difference between fat loss and muscle gain. That is why visual proof is essential for staying motivated on your fitness journey.
The Problem with Mirrors and Scales
Relying solely on the scale can be discouraging. Your weight fluctuates daily based on hydration, salt intake, and digestion. You might lose fat and gain muscle simultaneously, causing the number on the scale to stay the same or even go up.
The mirror is tricky too. Because you see your reflection every single day, your brain adapts to the slow changes. You miss the subtle improvements in definition or posture that add up over weeks and months.
Without objective visual records, it is easy to lose motivation. You need a way to look back and see exactly where you started compared to where you are now.
Meet Progress Photos
Body Journey’s Progress Photos feature gives you the objective truth. It allows you to capture consistent photos of your physique over time. By aligning your photos and viewing them side-by-side, you get clear visual proof of your hard work.
What It Does: It organizes your photos by date and angle (Front, Side, Back) and creates a timeline you can scrub through.
Why It Matters: It separates your actual progress from your daily feelings. The photos do not lie.
Who It Is For: Anyone who wants to see the real results of their training and nutrition, regardless of what the scale says.
Download Body Journey today to start building your visual timeline.
How to Use Progress Photos
Capturing and reviewing your progress is simple. Here is how to use the feature in Body Journey.
Step 1: Access the Body Dashboard
Navigate to the Body tab in the main navigation. This is your central hub for all body metrics. You will see a summary of your photos captured and your current streak.
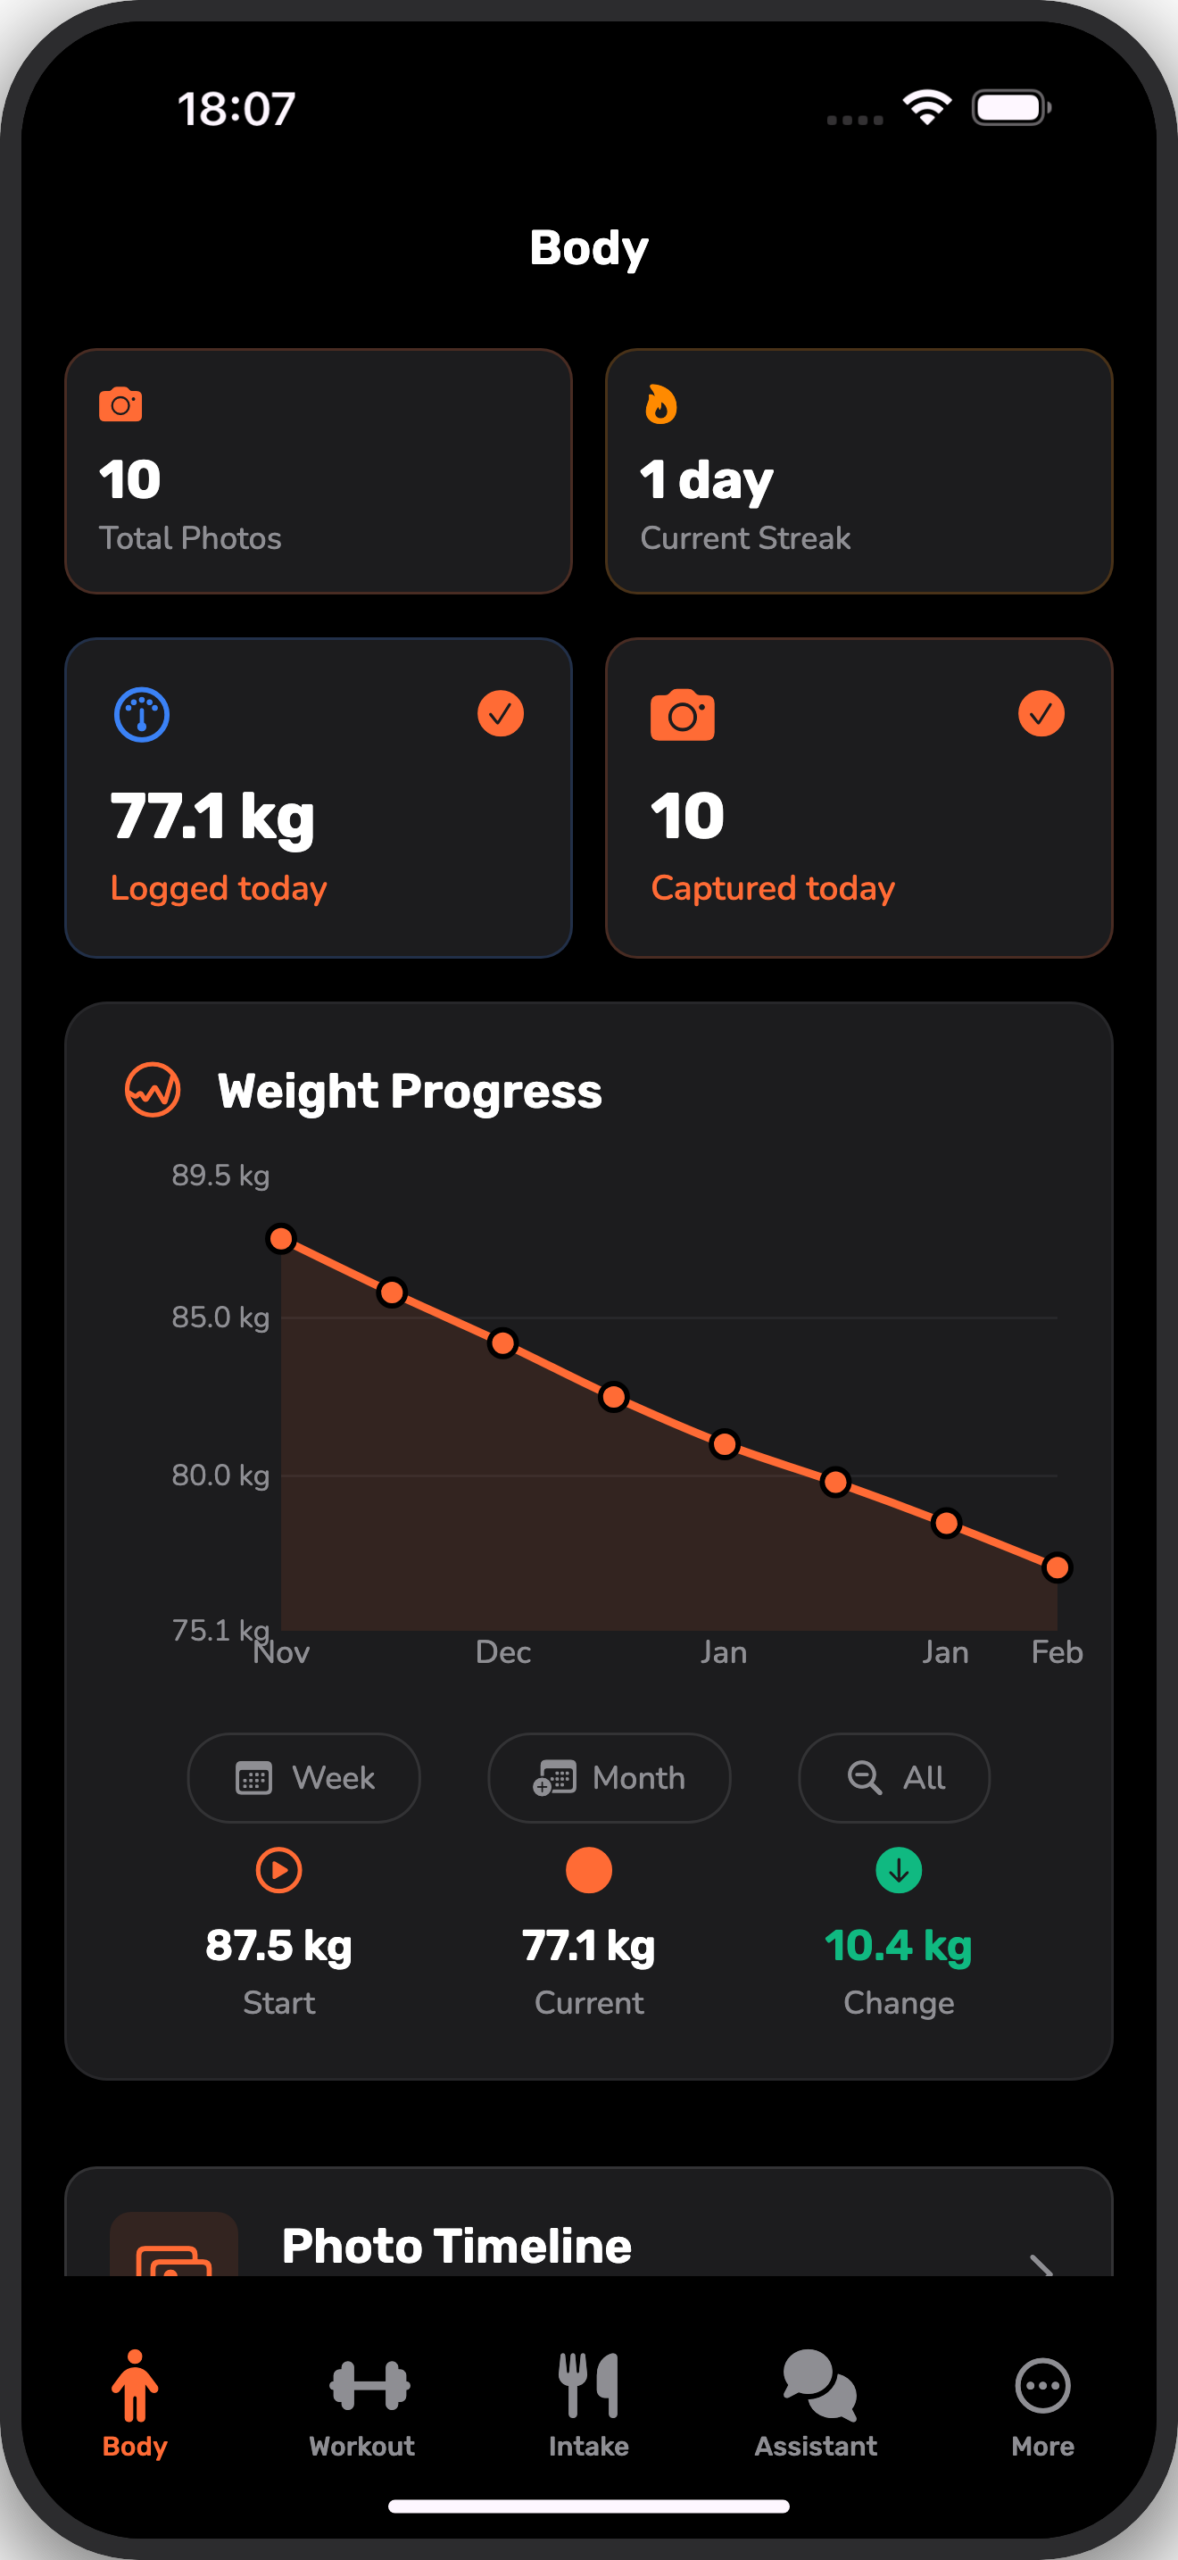
What You Will See: The “Body” screen with tiles for “Current Streak” and “Total Photos”. If you haven’t taken a photo today, the camera card will prompt you to “Capture Photo”.
Step 2: Capture Your Photo
Tap the camera icon or the “Capture Photo” card. This opens the dedicated camera interface. You can switch between Front, Side, and Back views. Use the grid lines to align your body in the center of the frame.
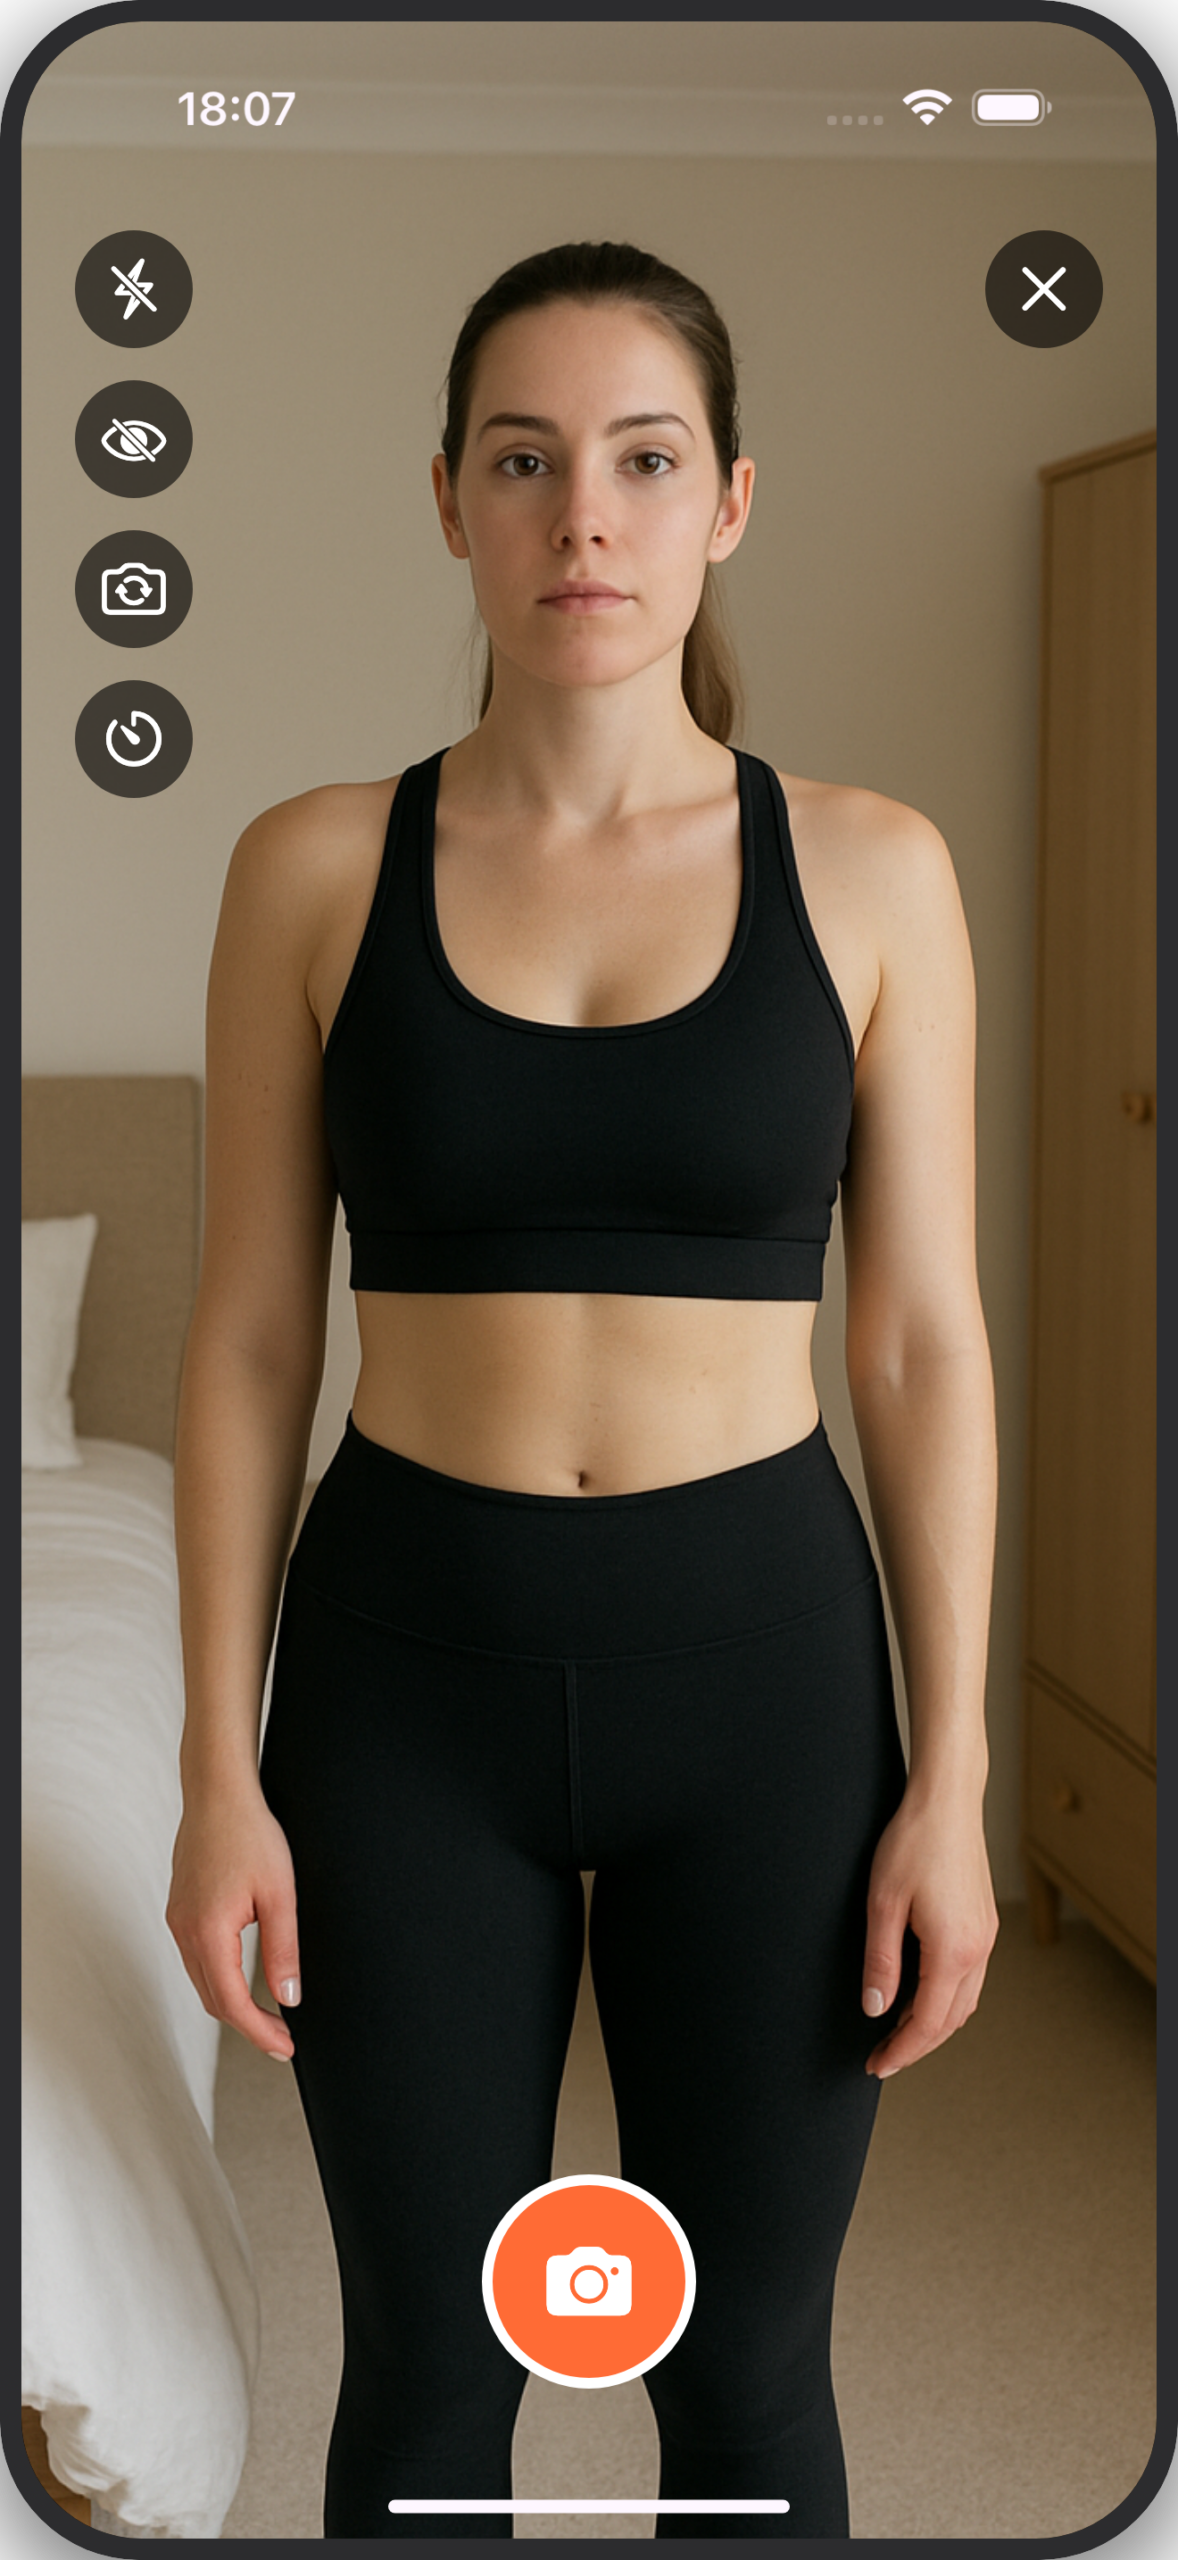
What You Will See: The camera view with a ghost overlay of your previous photo. This transparency helps you align your pose exactly with the last shot for a perfect comparison.
Step 3: Review Your Timeline
Once you have captured photos over time, tap “Photo Timeline” on the Body dashboard. This opens the timeline view. Here you can slide your finger across the filmstrip at the bottom to scrub through your history.
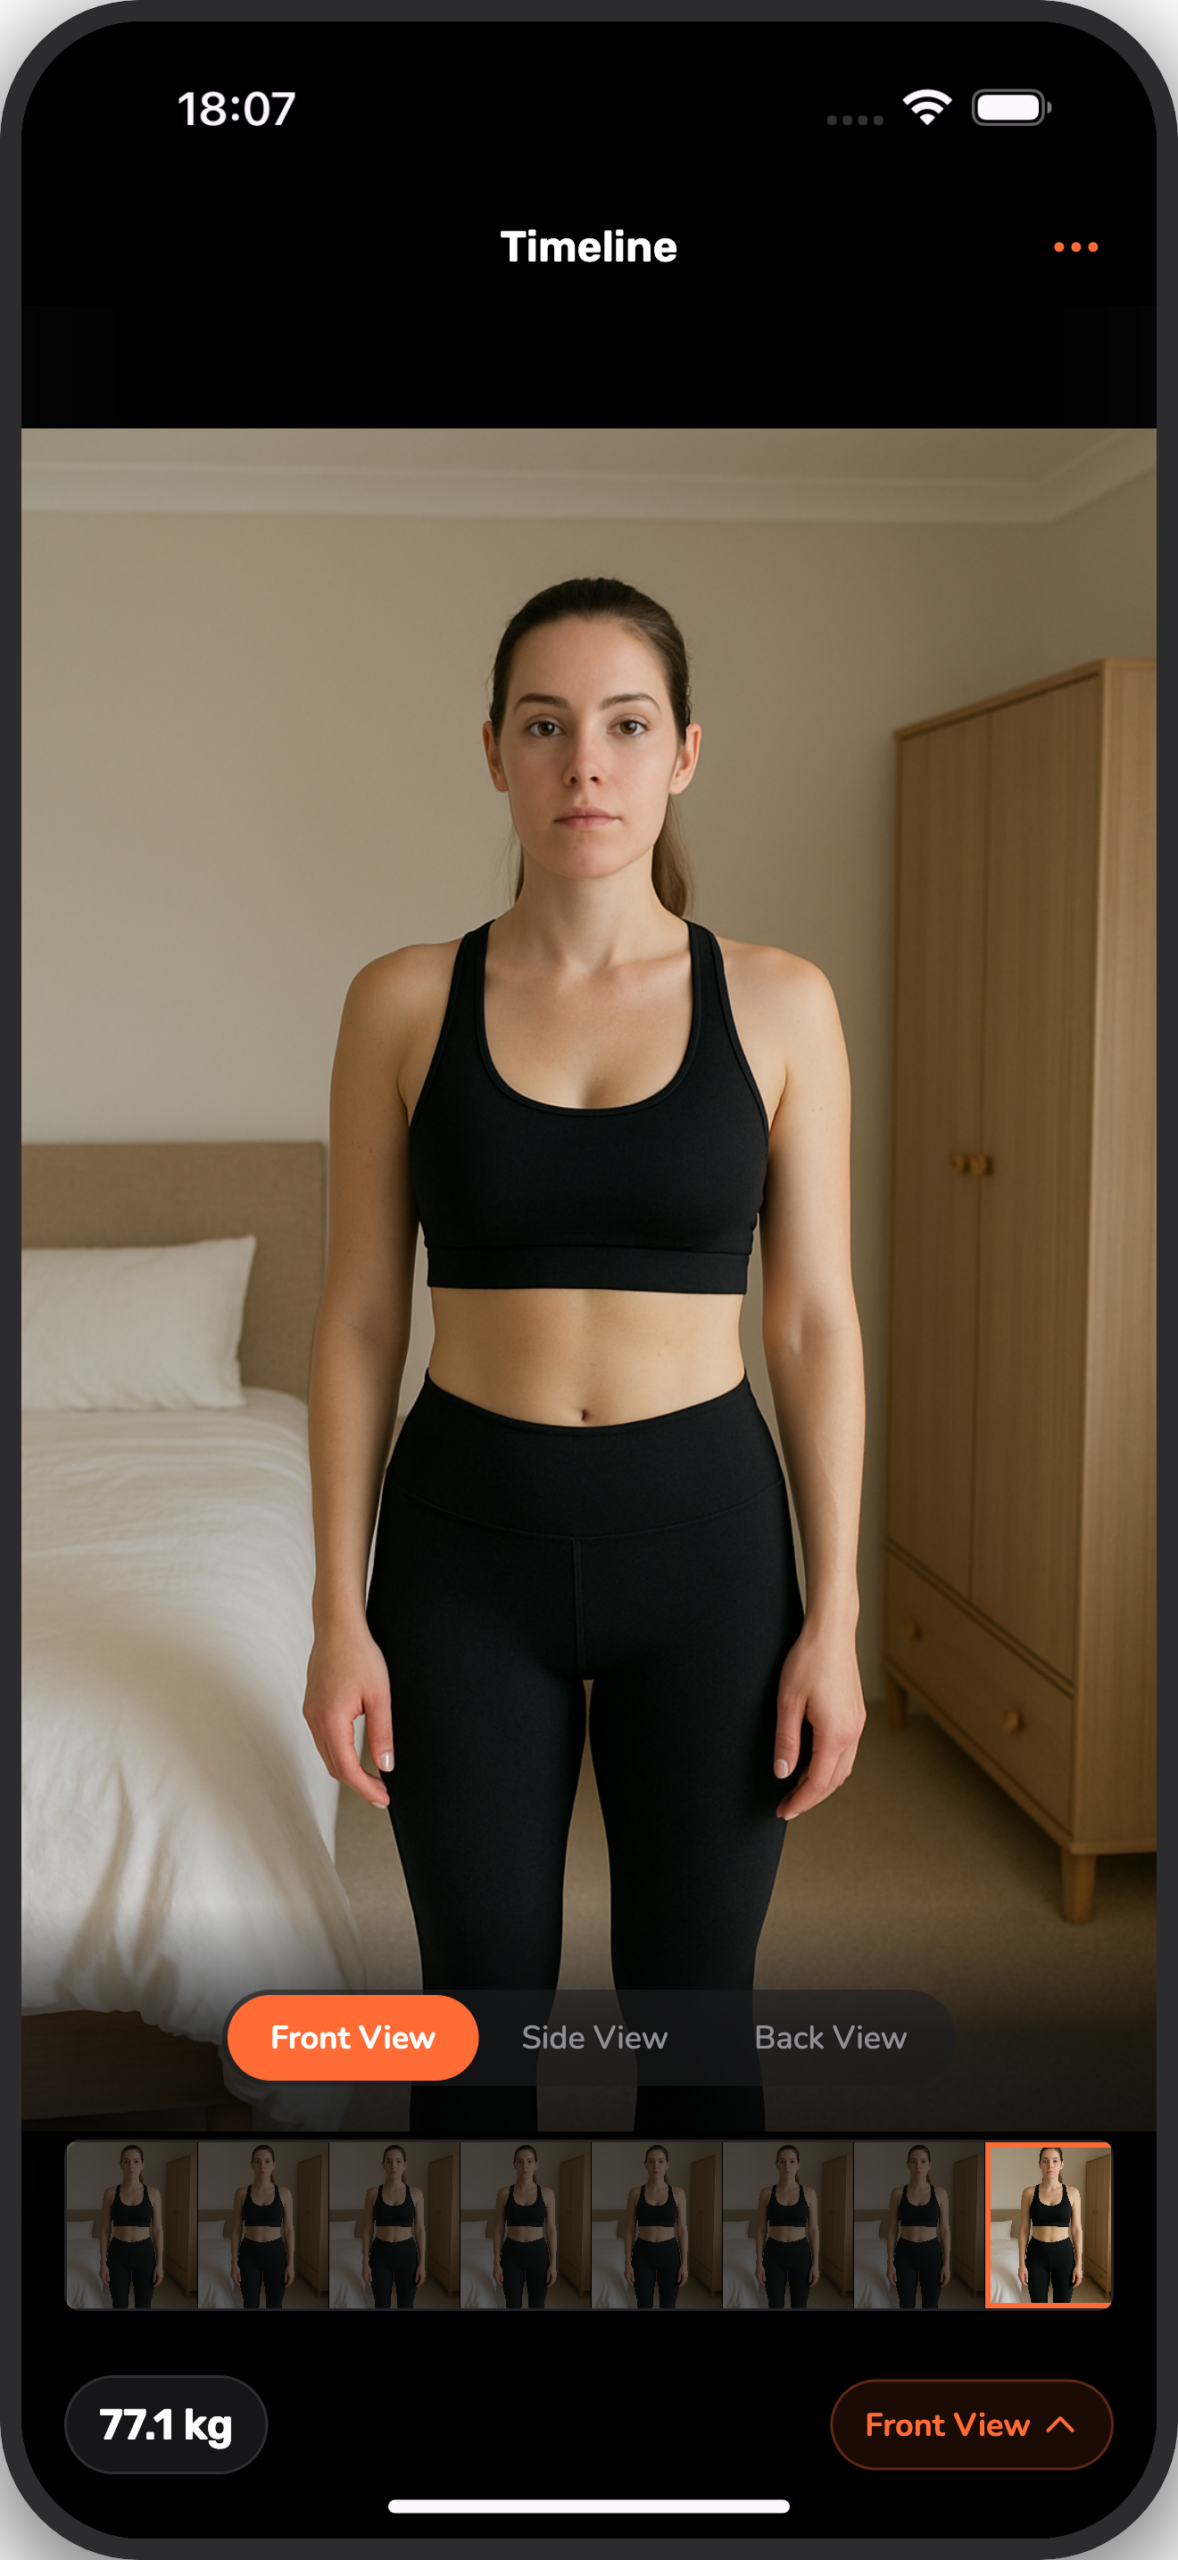
What You Will See: Your selected photo in the center with a filmstrip of all your dates below. You can easily switch between Front, Side, and Back angles using the pills at the bottom.
Real-World Use Cases
Progress photos are powerful tools for different stages of your fitness journey.
The Plateau Breaker
The Situation: You have been lifting weights for three months. The scale has not moved in two weeks. You feel like giving up because you think it is not working.
How Progress Photos Help: You compare your Day 1 photo with your Day 90 photo. You immediately see that your waist is tighter and your shoulders are more defined. You realize you have lost fat and built muscle.
The Result: You stay motivated and stick to your plan, knowing that the results are real.
The Motivation Finder
The Situation: It is a rainy Tuesday and you do not want to go to the gym. You have forgotten how far you have come.
How Progress Photos Help: You open Body Journey and scroll through your timeline. Seeing the visual transformation from where you started reminds you of the effort you have invested. You do not want to break the chain.
The Result: You pack your bag and get your workout done.
Pro Tips for Perfect Photos
To get the most out of your progress photos, consistency is key. Here are some tips to make your comparisons as accurate as possible.
Tip #1: Consistent Lighting
Always take your photos in the same place with the same lighting. Natural light from a window is best, but a bright lamp works too. Shadows can obscure muscle definition, so try to be consistent.
Tip #2: Same Time of Day
Take your photos at the same time, ideally first thing in the morning before breakfast. This minimizes variables like bloating from food or water.
Tip #3: Wear the Same Clothes
Wear the same underwear or swimwear in every photo. This removes distractions and lets you focus purely on body changes.
Common Questions
How often should I take progress photos?
We recommend taking photos once a week. This strikes a good balance between seeing progress and not obsessing over daily fluctuations.
Can I keep my photos private?
Yes. Your photos are stored securely on your device. You can choose to export or share them, but they are private by default.
Do I need to pose?
Keep it simple. Stand relaxed for one set, and flex for another if you like. The most important thing is to do the same pose every time.
How Progress Photos Fit Your Journey
Progress photos are just one piece of the puzzle. When you combine them with workout logging and nutrition tracking in Body Journey, you get a complete picture of your health. Seeing the correlation between your consistent workouts and the visual changes in your timeline is incredibly rewarding.
Start Using Progress Photos Today
Don’t let another week go by without capturing your baseline. Download Body Journey now and take your first set of photos. It takes less than two minutes, and your future self will thank you for the proof.
Stop guessing if your program is working. Start seeing the truth with Body Journey.
Related Content
Body Journey Out Now on Android: The Complete Tracking Experience
Body Journey is now available on Android! Download the app from the Google Play Store to track workouts, nutrition, and progress photos on your favorite device.