Pull Day Mastery: Complete Back and Biceps Workout
# Pull Day Mastery: Complete Back and Biceps Workout
If you want to build a strong, defined upper body, a structured pull day workout is the ultimate way to achieve your goals. This routine targets all of your pulling muscles, including your back, rear shoulders, and biceps, in a single session. By grouping these muscles together, you can maximize your training efficiency and allow for optimal recovery between workouts. Ready to take your upper body training to the next level?
## Who This Workout Is For
This training guide is designed for intermediate lifters who want to execute a complete pull day workout to build upper body strength and muscle mass. If you have already built a solid foundation with our beginner full body strength routine, it is time to move on to a split. This workout assumes you have access to a standard gym with barbells, dumbbells, and cable machines.
– **Fitness Level:** Intermediate
– **Equipment Needed:** Barbell, dumbbells, pull-up bar, cable machine
– **Time Required:** 50 to 60 minutes
– **Training Focus:** Hypertrophy and Strength
## Program Overview
A pull day workout focuses on elbow flexion and shoulder extension movements. By training all of your pulling muscles together, you give them a full week to recover before hitting them again. This prevents overuse injuries and ensures maximum effort during every set. According to research published in the Journal of Sports Sciences, distributing weekly training volume across a split routine is highly effective for muscle hypertrophy.
**Training Split:** This routine is the pull portion of a classic push, pull, legs training split, making it a highly effective pull day workout for balanced development.
**Frequency:** Perform this workout once or twice per week depending on your experience.
**Rest Between Sets:** Rest 90 to 120 seconds between compound lifts, and 60 to 90 seconds for isolation lifts.
## Warm-Up (5 to 10 Minutes)
A thorough warm-up is essential before starting your pull day workout to prepare your back and biceps for the heavy loads ahead. Dynamic stretches increase blood flow, lubricate your shoulder joints, and activate your central nervous system.
### Dynamic Warm-Up Sequence
1. **Arm Swings** – 15 reps forward and backward
– Stand tall and swing your arms wide to open up your chest and upper back.
2. **Scapular Pull-Ups** – 10 to 12 reps
– Hang from a bar and pull your shoulder blades down without bending your elbows.
3. **Band Pull-Aparts** – 15 to 20 reps
– Hold a resistance band in front of you and pull it apart to activate your upper back.
4. **Dumbbell Halo** – 8 reps per direction
– Hold a light dumbbell and rotate it around your head to warm up your shoulder rotators.
## The Workout
### Exercise 1: Pull-Ups (or Lat Pulldowns)
**Sets:** 4 | **Reps:** 6 to 8 | **Rest:** 2 minutes
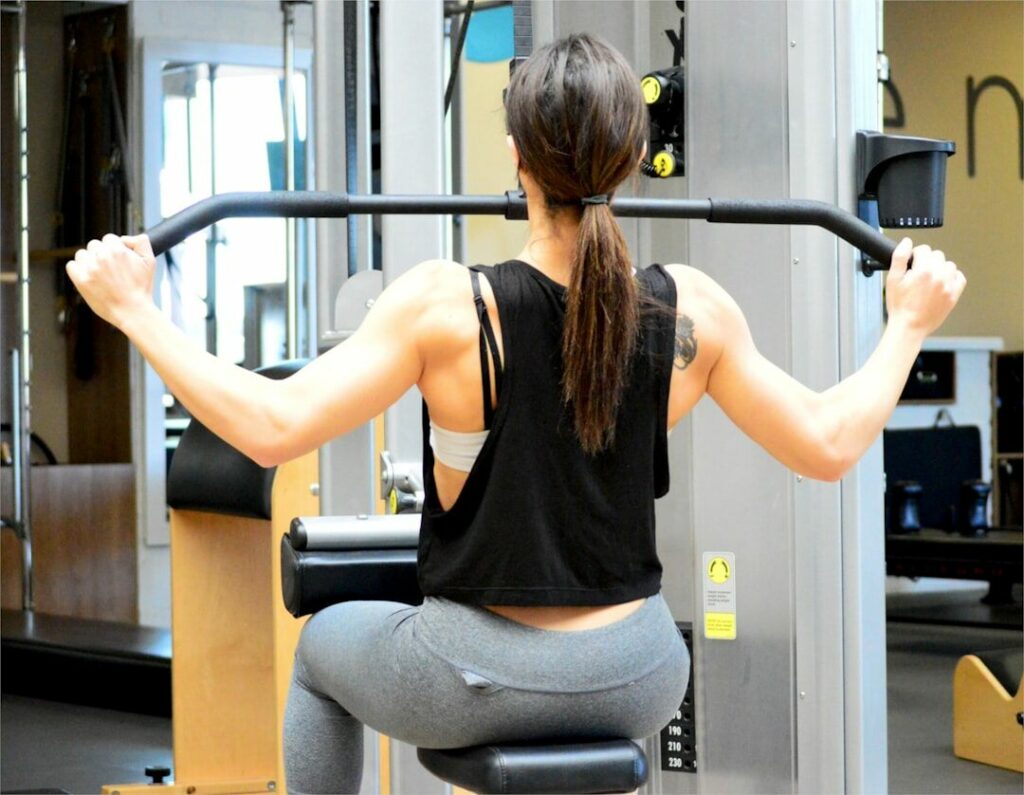
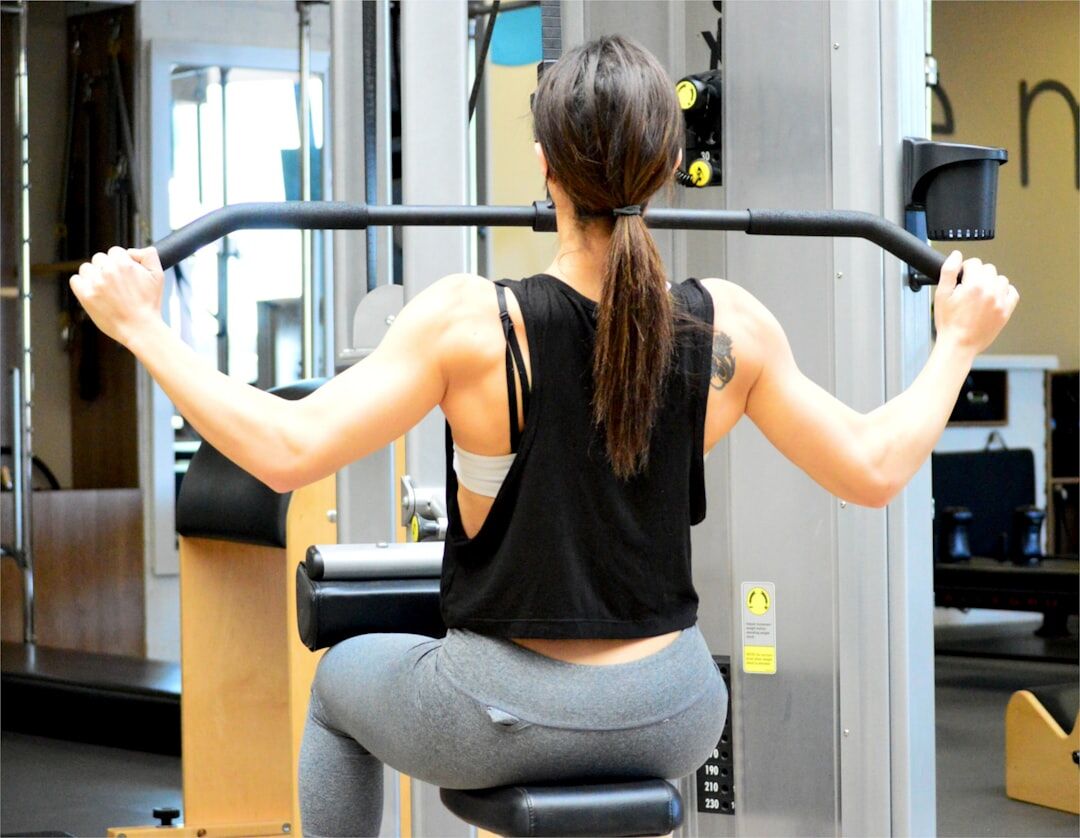
The pull-up is the ultimate back builder and a cornerstone of any effective pull day workout. It recruits your latissimus dorsi, rhomboids, and biceps to pull your entire bodyweight upward. Starting with pull-ups ensures you have maximum energy to execute this demanding bodyweight movement. If pull-ups are too difficult, the lat pulldown machine is an excellent replacement that allows you to adjust the resistance.
**How to Perform:**
1. Grab the pull-up bar with an overhand grip, slightly wider than shoulder-width.
2. Hang with fully extended arms and pull your shoulders down away from your ears.
3. Drive your elbows down toward your ribs and pull your chest toward the bar.
4. Squeeze your back muscles at the top, then lower yourself slowly to a dead hang.
5. Repeat for the target number of repetitions.
**Form Cues:**
– Lead with your chest and keep your eyes focused on the bar.
– Imagine pulling the bar down to meet your collarbone.
– Squeeze your shoulder blades together at the peak of the movement.
**Modifications:**
– **Beginner:** Use an assisted pull-up machine or perform lat pulldowns on a cable machine.
– **Advanced:** Add weight using a dipping belt, or perform a three-second eccentric lowering phase.
**Common Mistakes:**
– **Kicking and swinging:** Avoid using leg drive or momentum. Keep your body tight and controlled.
– **Half repetitions:** Do not cheat yourself by stopping short. Go all the way down to a dead hang.
**How Body Journey Helps:** Log your reps for pull-ups in the Body Journey app. If you use a weight belt, note the added resistance in your workout logs to monitor your progress.
—
### Exercise 2: Barbell Bent-Over Row
**Sets:** 4 | **Reps:** 8 to 10 | **Rest:** 2 minutes
While pull-ups build width, barbell rows build thickness. This heavy compound lift targets the middle back, traps, and lats, while requiring significant lower back and core stability. It is the perfect follow-up to vertical pulling in this pull day workout.
**How to Perform:**
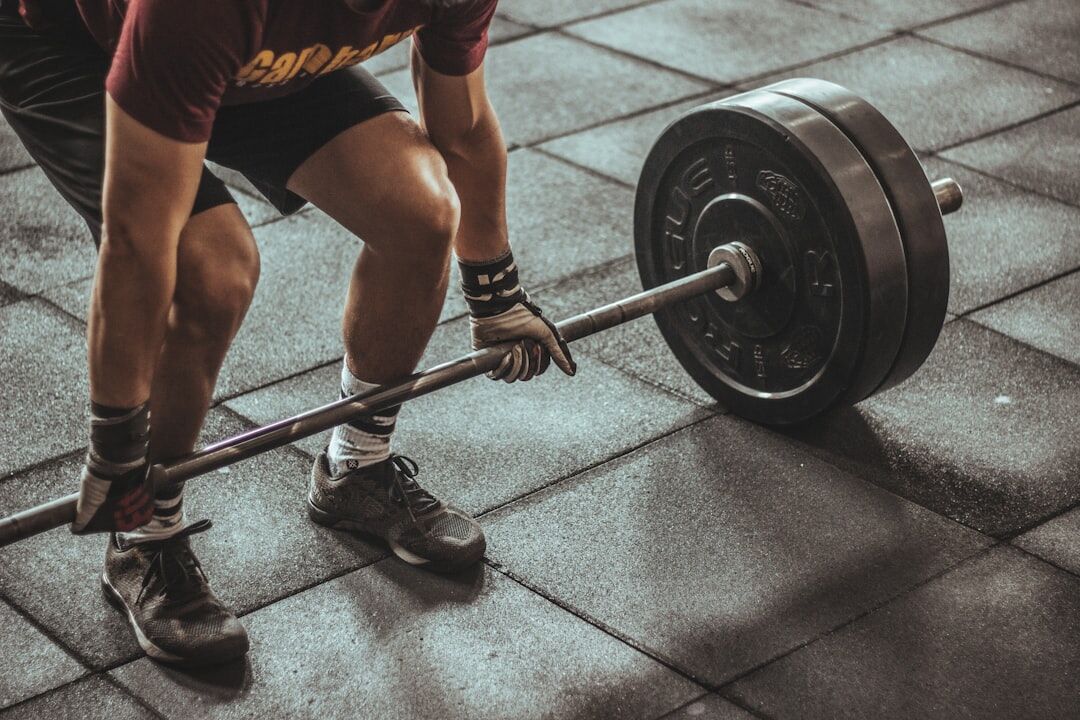
1. Stand with your feet shoulder-width apart, holding a barbell with an overhand grip.
2. Hinge forward at the hips, keeping your back flat and knees slightly bent.
3. Let the bar hang straight down in front of your shins.
4. Pull the bar to your lower ribcage, leading with your elbows.
5. Lower the weight under control back to the starting position.
**Form Cues:**
– Keep your torso angle consistent. Do not bounce up and down.
– Keep your core braced as if you are preparing for a punch.
– Pull the bar toward your belly button, not your chest.
**Modifications:**
– **Beginner:** Perform chest-supported rows on an incline bench to protect your lower back.
– **Advanced:** Use a pendlay row style, starting each repetition from a dead stop on the floor.
**Common Mistakes:**
– **Rounding your lower back:** This places dangerous stress on your spine. Keep your spine perfectly neutral.
– **Using too much weight:** If you have to stand up straight to pull the bar, the weight is too heavy.
**How Body Journey Helps:** Use Body Journey to track your barbell row weight and watch your strength grow. Reviewing past logs helps you decide when to add weight.
—
### Exercise 3: Romanian Deadlift (Barbell or Dumbbell)
**Sets:** 3 | **Reps:** 8 to 10 | **Rest:** 90 seconds
The Romanian deadlift is a posterior chain powerhouse. It targets your hamstrings, glutes, and lower back, which are all heavily involved in pulling movements. Incorporating this hinge exercise into your pull day workout ensures your lower back is strong and resilient. According to a study in the Journal of Strength and Conditioning Research, the Romanian deadlift provides exceptional activation of the gluteus maximus and hamstrings compared to traditional deadlifts.
**How to Perform:**
1. Stand tall holding a barbell or dumbbells in front of your thighs.
2. Keep a slight bend in your knees and your shoulders pulled back.
3. Push your hips backward as you slide the weights down your thighs.
4. Lower the weight until you feel a deep stretch in your hamstrings.
5. Squeeze your glutes and drive your hips forward to stand tall.
**Form Cues:**
– Think about closing a door behind you with your hips.
– Keep the weight close to your legs throughout the entire movement.
– Avoid arching or rounding your back at any point.
**Modifications:**
– **Beginner:** Master the hip hinge pattern using a light dowel or bodyweight.
– **Advanced:** Try single-leg Romanian deadlifts to challenge your balance and target unilateral stability.
**Common Mistakes:**
– **Squatting the weight:** Do not bend your knees excessively. This is a hinge, not a squat.
– **Looking up:** Keep your neck neutral by looking at the floor in front of you.
**How Body Journey Helps:** Log your sets in Body Journey to track your progressive overload. Download Body Journey to keep your progress structured.
—
### Exercise 4: Single-Arm Dumbbell Row
**Sets:** 3 | **Reps:** 10 to 12 per side | **Rest:** 90 seconds
Unilateral training is crucial for correcting muscle imbalances. The single-arm dumbbell row is a key component of this pull day workout, allowing you to focus on one side of your back at a time to promote symmetry and increase your range of motion.
**How to Perform:**
1. Place your right knee and right hand on a flat bench for support.
2. Hold a dumbbell in your left hand, letting it hang straight down.
3. Pull the dumbbell up and back toward your hip, keeping your elbow tucked.
4. Squeeze your lat at the top, then lower the dumbbell under control.
5. Complete your repetitions, then switch to the other side.
**Form Cues:**
– Pull the weight toward your hip, not your shoulder.
– Keep your shoulders square to the bench. Do not twist your torso.
– Stretch your lat at the bottom of each rep.
**Modifications:**
– **Beginner:** Place both feet on the floor and support your free hand on a dumbbell rack.
– **Advanced:** Pause for two seconds at the peak of contraction.
**Common Mistakes:**
– **Elbow flaring:** Keep your arm close to your side to target your lats instead of your shoulders.
– **Yanking the weight:** Pull with control rather than using momentum.
**How Body Journey Helps:** Compare your strength between your left and right side by logging both in the app. Body Journey makes it easy to spot imbalances.
—
### Exercise 5: Face Pulls
**Sets:** 3 | **Reps:** 15 to 20 | **Rest:** 60 seconds
Face pulls are the ultimate posture exercise to include in your pull day workout. They target your rear deltoids, rotator cuffs, and upper back. This helps counteract the shoulder-rounding effects of daily desk work and heavy chest pressing.
**How to Perform:**
1. Set a cable pulley at upper chest height with a rope attachment.
2. Grab the rope with an overhand grip and step back to create tension.
3. Pull the center of the rope toward your nose, flaring your elbows.
4. Pull your hands apart as you reach your face, squeezing your rear shoulders.
5. Return slowly to the starting position under control.
**Form Cues:**
– Squeeze your shoulder blades together at the end of the pull.
– Keep your chest up and shoulders down.
– Think about showing off your biceps at the end of the movement.
**Modifications:**
– **Beginner:** Use a light resistance band anchored to a sturdy post.
– **Advanced:** Hold the contraction for three seconds on every rep.
**Common Mistakes:**
– **Pulling to the chest:** Make sure to pull toward your face to target the rear delts.
– **Using too much weight:** This is an isolation exercise. Keep the weight light and focus on feel.
**How Body Journey Helps:** Face pulls require light weights and high reps. Track your rep counts in Body Journey to ensure you are meeting your weekly volume goals.
—
### Exercise 6: Incline Dumbbell Bicep Curl
**Sets:** 3 | **Reps:** 10 to 12 | **Rest:** 60 seconds
By sitting on an incline during this pull day workout, you place the bicep in a stretched position. This increases the range of motion and targets the long head of the bicep, leading to better muscle activation.
**How to Perform:**
1. Sit back on an incline bench set to 45 degrees, holding dumbbells at arm’s length.
2. Keep your elbows pinned back behind your torso.
3. Curl the weights upward, keeping your palms facing forward.
4. Squeeze your biceps at the top, then lower the weights slowly.
5. Repeat for the target number of repetitions.
**Form Cues:**
– Keep your elbows locked in place. Do not let them swing forward.
– Control the lowering phase of the curl.
– Focus on the stretch at the bottom of the movement.
**Modifications:**
– **Beginner:** Perform standing dumbbell curls if you do not have an incline bench.
– **Advanced:** Rotate your wrists outward at the top of the curl to increase contraction.
**Common Mistakes:**
– **Letting the elbows drift forward:** This recruits the front deltoids, taking tension off the biceps.
– **Swinging the weights:** Keep your back flat against the bench to prevent cheating.
**How Body Journey Helps:** Bicep growth requires precise tracking. Log every set of curls in the Body Journey app to ensure you are progressively overloading.
—
### Exercise 7: Dumbbell Hammer Curls
**Sets:** 3 | **Reps:** 12 to 15 | **Rest:** 60 seconds
We finish this pull day workout with hammer curls. By keeping a neutral grip, you target the brachialis and brachioradialis, which are crucial for forearm strength and bicep thickness.
**How to Perform:**
1. Stand tall holding dumbbells by your sides with your palms facing each other.
2. Curl the weights upward while keeping your palms facing inward.
3. Squeeze your forearms and biceps at the top.
4. Lower the weights slowly back to the starting position.
5. Repeat for the target repetitions.
**Form Cues:**
– Keep your wrists locked and straight.
– Keep your torso perfectly still.
– Squeeze the weights hard at the peak.
**Modifications:**
– **Beginner:** Perform alternating hammer curls to focus on one arm at a time.
– **Advanced:** Perform cross-body hammer curls, pulling the weight toward your opposite shoulder.
**Common Mistakes:**
– **Swinging the hips:** Stand with your feet shoulder-width apart and brace your core to prevent movement.
– **Bent wrists:** Keep your wrists firm to avoid forearm strain.
**How Body Journey Helps:** You can track your weekly bicep and forearm volume trends in Body Journey. Try Body Journey free to monitor your upper body progress.
## Cool-Down and Stretching (5 to 10 Minutes)
A proper cool-down helps lower your heart rate and begins the recovery process. Take time to stretch the muscles you just worked heavily to improve flexibility.
### Static Stretch Sequence
1. **Lat Stretch** – 45 seconds per side
– Hold onto a sturdy post, lean your hips back, and feel the stretch down the side of your back.
2. **Bicep Stretch** – 45 seconds per side
– Extend one arm behind you, place your hand on a wall, and gently turn your body away.
3. **Upper Back Stretch** – 45 seconds
– Interlace your fingers in front of you, push your hands forward, and round your upper back.
4. **Child’s Pose** – 60 seconds
– Kneel on the floor, push your hips back to your heels, and reach your arms forward to stretch your lats.
## Progression Strategy
To build muscle and strength with a pull day workout, you must apply the principle of progressive overload. Your body adapts to the stress placed upon it, so you must continually increase the challenge. According to guidelines from the National Strength and Conditioning Association, progressive overload is the most critical factor for long-term athletic development.
**Week 1 to 2:** Focus on mastering the form. Choose weights that allow you to complete all reps with perfect technique.
**Week 3 to 4:** Begin increasing the weight on your primary compound lifts like barbell rows. If you cannot increase the weight, add one or two repetitions per set.
**Week 5 to 6:** Implement intensity techniques. Slow down the eccentric portion of your lifts or shorten your rest periods.
**Week 7 to 8:** Aim to lift heavier weights than you did in week 3.
**Tracking Your Progress:** For details on planning your weekly training splits and progressive overload rules, review our comprehensive hub on workout training and programming. Make sure to log every single set in Body Journey to monitor your progress over time.
## Recovery and Frequency
Building muscle happens outside of your workouts. When you lift weights, you are breaking down muscle tissue. You must allow sufficient time for that tissue to repair and grow stronger.
For this routine, you should aim to perform this pull day workout as part of a three-day split. Pair this workout with our push day mastery program and our lower body hypertrophy workout for a complete three-day split. Ensure you are getting seven to nine hours of sleep per night and eating adequate protein to support recovery.
**Body Journey Tip:** Log how you feel post-workout in the app to track your recovery. Keeping an eye on your energy trends helps you prevent overtraining.
## Common Questions
### How heavy should I lift?
Select a weight that makes the last two repetitions of each set feel very challenging. If you finish your set and feel like you could have done ten more, the weight is too light.
### Can I do this workout at home?
Yes, if you have dumbbells and a pull-up bar. You can replace the barbell rows with dumbbell rows and face pulls with resistance band pulls.
### How long does it take to see results?
If you remain consistent and apply progressive overload, you will see strength gains in two to three weeks. Physical changes usually become visible in six to eight weeks.
## The Bottom Line
This pull day workout is an incredibly efficient way to build a strong back and biceps. Consistency and progressive overload are the keys to seeing actual physical changes. Focus on your form, be patient with the process, and stay consistent.
## Start Your Transformation Today
This workout delivers results, but only if you track your progress. Get started with Body Journey to log every set, monitor your gains, and stay accountable. Your transformation starts with tracking. Download the app today and build the discipline that leads to lasting change.