Build Core Power: Complete Core Strength Routine

A weak core is the single biggest bottleneck holding back your strength, balance, and athletic progress. Many lifters spend years performing endless sit-ups and crunches without building real structural stability. A complete core strength routine goes far beyond chasing six-pack abs. It builds a bulletproof midsection that protects your spine, transfers power efficiently during heavy lifts, and eliminates nagging lower back discomfort.
Your core acts as the central engine for every movement your body produces. When you squat, deadlift, carry groceries, or sprint, your trunk muscles contract to stabilize your spine. By training your entire midsection through anti-extension, anti-rotation, anti-lateral flexion, and posterior chain stabilization, you create an unbreakable foundation for lifelong fitness.

Who This Complete Core Strength Routine Is For
This program is designed for fitness enthusiasts of all levels who want to build a functional, resilient midsection. Whether you are an experienced lifter trying to increase your main compound lifts or a beginner wanting to relieve lower back stiffness, this routine provides structured progressions to match your current ability. It works exceptionally well alongside our bodyweight home workout program to build total body control.
Because core stability relies on technical control rather than maximal weight, focus on precision and breathing. If you train at home, you only need a simple mat and a light dumbbell or water bottle. If you train in a commercial gym, you can utilize cables and weight plates for extra resistance.
- Fitness Level: Beginner to Advanced (with scaled modifications)
- Equipment Needed: Exercise mat, light dumbbell or kettlebell, ab wheel (optional), cable machine or resistance band
- Time Required: 45 to 60 minutes
- Training Focus: Anti-extension, anti-rotation, rotational strength, and lumbar stability
Program Overview
The philosophy behind this complete core strength routine relies on multi-planar stabilization. The human midsection consists of four key muscle groups: the rectus abdominis, internal and external obliques, transversus abdominis, and the erector spinae complex in your lower back. Traditional crunches only flex your spine forward, ignoring three-quarters of your core functionality.
According to research published in the Journal of Strength and Conditioning Research, integration core exercises that engage the shoulders, hips, and trunk simultaneously generate significantly higher overall muscle activation than isolated floor crunches. By challenging your body to resist movement under load, you condition your nervous system to keep your spine safe during demanding physical tasks.
To maximize your results, log your hold times and rep counts accurately. You can download Body Journey to record your sets and track your progress over time. For more insight into structuring your weekly split, review our master guide on workout training and programming.
Training Split: Perform this session 2 to 3 times per week as a standalone workout or after your main lifting workouts.
Frequency: Allow 48 hours of recovery between intense core sessions.
Rest Between Sets: Rest 60 to 90 seconds for isometric holds and anti-rotation movements; rest 2 minutes for heavy dynamic exercises.
Warm-Up (5 to 10 Minutes)
Priming your nervous system and lubricating your spinal joints is essential before executing a complete core strength routine. A proper warm-up activates your deep stabilizing muscles and prepares your diaphragm for deep bracing.
Dynamic Warm-Up Sequence
- Cat-Cow Stretch: 2 sets of 10 reps. Begin on hands and knees. Inhale as you arch your spine downward, then exhale as you round your spine toward the ceiling.
- Bird-Dog (Bodyweight): 2 sets of 8 reps per side. On all fours, reach your right arm forward and left leg backward until parallel to the floor, hold for 2 seconds, and return.
- Deadbug Hold: 2 sets of 10 reps per side. Lie on your back with arms extended straight up and knees bent at 90 degrees. Lower opposite arm and leg slowly while keeping your lower back pressed flat into the floor.
- Standing Torso Rotations: 2 sets of 15 reps. Stand tall with feet shoulder-width apart and rotate your torso smoothly side to side to warm up your obliques.
The Workout
Exercise 1: Ab Wheel Rollout (or Plank Rollout)
Sets: 4 | Reps: 8-12 | Rest: 90 to 120 seconds
The ab wheel rollout is the undisputed king of anti-extension exercises. As your body rolls forward, gravity pulls your hips downward, forcing your rectus abdominis and obliques to contract powerfully to prevent your lower back from sagging into arching hyperextension.
According to electromyographic studies on abdominal muscle activation, the ab rollout elicits higher muscle recruitment across the entire rectus abdominis than traditional sit-ups. Starting with this high-intensity movement ensures your nervous system is completely fresh for optimal control.
How to Perform:
- Kneel on an exercise mat with your hands gripping the handles of an ab wheel directly beneath your shoulders.
- Tuck your chin slightly, brace your core tightly, and tuck your pelvis into a subtle posterior tilt.
- Inhale as you slowly roll the wheel forward in a straight line, extending your body as far as you can without letting your lower back arch.
- Pause for one second in the fully extended position, squeezing your abdominals hard.
- Exhale as you pull your body back to the starting position by contracting your core, keeping your arms straight throughout.
- Reset your breathing and repeat for the target repetitions.
Form Cues:
- Never let your hips sag toward the floor; if your back arches, reduce your range of motion immediately.
- Keep your arms locked straight and initiate the pull with your abdominals, not your hips or arms.
- Maintain constant core tension from the first rep to the last.
Modifications:
- Beginner: Plank shoulder taps or elevated swiss ball rollouts to reduce the leverage distance.
- Advanced: Standing ab wheel rollout from your toes, or weighted vest rollouts.
Common Mistakes:
- Hyperextending the lower back: This shifts strain directly onto your lumbar spine. Only roll out as far as your abdominal strength allows.
- Bending the elbows: Bending your arms turns this exercise into a triceps movement. Keep your elbows straight.
How Body Journey Helps: Log your rollout reps in Body Journey. Tracking your weekly progress helps you safely expand your range of motion as your core gets stronger.
Exercise 2: Pallof Press (Anti-Rotation)
Sets: 3 | Reps: 10-12 per side | Rest: 60 to 90 seconds
While most core exercises focus on creating movement, the Pallof press trains anti-rotation, teaching your body to resist unwanted twisting forces. This movement strengthens your obliques, transversus abdominis, and deep spinal stabilizers, creating exceptional core stiffness that translates directly to heavy squats, deadlifts, and athletic movements.
Developing strong anti-rotational stability is essential when pairing core work with intense training sessions like our back and biceps pull day workout.
How to Perform:
- Set a cable pulley or resistance band at chest height and stand perpendicular to the anchor point.
- Grip the handle with both hands, pull it to the center of your chest, and step away until you feel side tension.
- Set your feet shoulder-width apart, bend your knees slightly, and brace your core.
- Exhale as you press the handle straight out in front of your chest until your arms are fully extended.
- Hold the extended position for 2 seconds, resisting the cable’s urge to twist your torso back toward the anchor.
- Inhale as you slowly pull the handle back to your chest under complete control.
- Complete all repetitions on one side before turning around to train the opposite side.
Form Cues:
- Keep your shoulders and hips square facing straight ahead throughout the entire set.
- Press the handle in a straight line without letting your hands drift toward the cable machine.
- Squeeze your glutes and press your feet firmly into the ground for a stable base.
Modifications:
- Beginner: Half-kneeling Pallof press (one knee on the floor) to eliminate hip compensation.
- Advanced: Overhead Pallof press (press out, then lift arms vertically above head before returning).
Common Mistakes:
- Twisting your hips: Letting your hips rotate defeats the anti-rotational benefit. Lock your hips forward.
- Rushing the press: Fast reps bypass the isometric stability requirement. Hold each extension for 2 full seconds.
How Body Journey Helps: Record your cable resistance and hold duration in Body Journey to ensure you are consistently applying progressive overload.
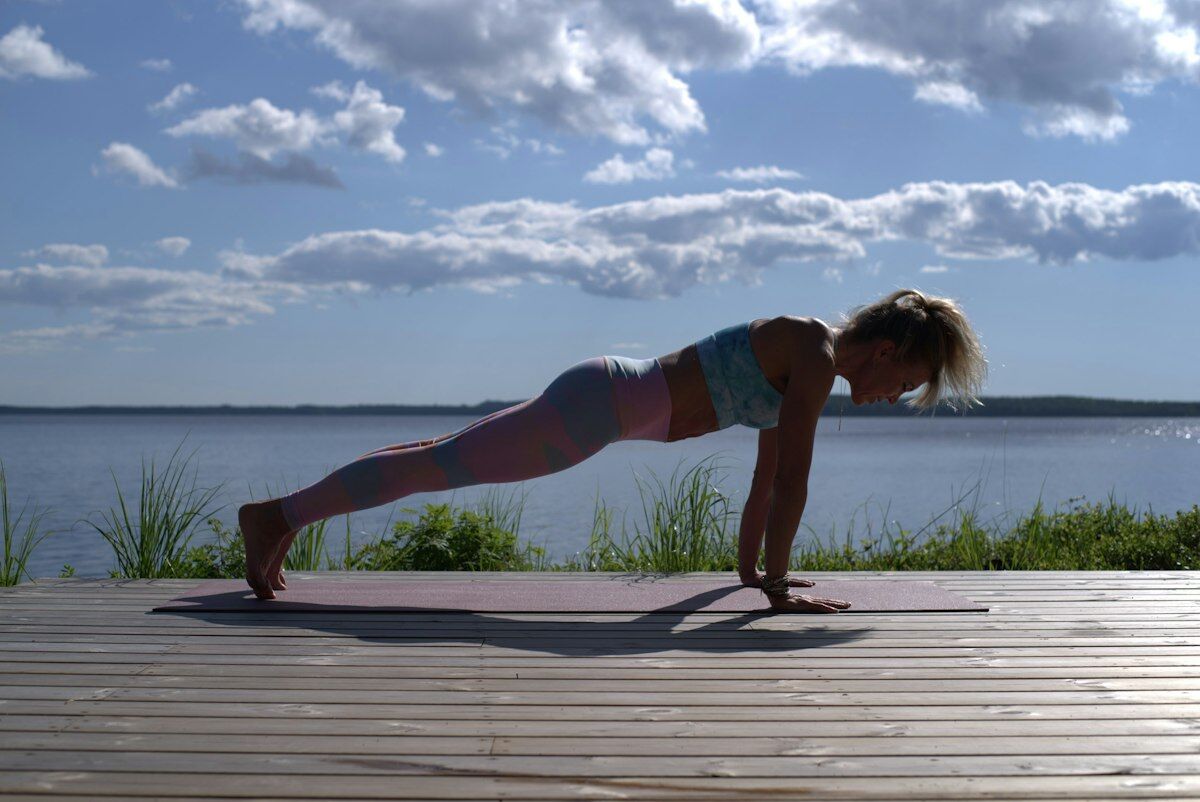
Exercise 3: RKC Plank (Hardstyle Isometric Hold)
Sets: 3 | Reps: 20-30 seconds max tension | Rest: 60 seconds
Unlike traditional passive planks where people relax and hold for minutes, the RKC (Russian Kettlebell Challenge) plank is a maximum-tension isometric hold. By actively pulling your elbows toward your toes and squeezing your glutes as hard as possible, you generate intense muscular contraction that builds true core stiffness in seconds rather than minutes.
A study on spine biomechanics and abdominal bracing showed that short, high-intensity isometric contractions train deep endurance and motor unit recruitment far more effectively than low-tension long holds.
How to Perform:
- Lie face down on your mat and place your forearms on the floor with your elbows directly under your shoulders.
- Clench your hands into tight fists and set your feet hip-width apart.
- Lift your body into a straight line from head to heels, tucking your pelvis into a slight posterior tilt.
- Squeeze your glutes, quads, and abdominals with 100 percent effort.
- Actively pull your elbows downward toward your toes while pulling your toes upward toward your elbows without moving your position.
- Breathe forcefully through your diaphragm while maintaining absolute maximum full-body tension for 20 to 30 seconds.
- Lower yourself smoothly to the floor and rest.
Form Cues:
- Contract every muscle group simultaneously to create total body tension.
- Do not hold your breath completely; take shallow, forceful breaths while keeping your core rock hard.
- Keep your neck in line with your spine by looking at your hands.
Modifications:
- Beginner: Standard forearm plank focusing on 30-second clean holds.
- Advanced: RKC plank with single-leg lift or weighted plate on your upper back.
Common Mistakes:
- Piking the hips: Lifting your hips into an inverted V reduces abdominal tension. Keep your body straight.
- Passive holding: Just hanging out on your elbows defeats the RKC method. Pull your elbows and toes together aggressively.
How Body Journey Helps: Use the built-in workout timer when you try Body Journey free to keep your RKC hold times exact and your rest periods disciplined.
Exercise 4: Hanging Leg Raise (or Captain’s Chair Knee Raise)
Sets: 3 | Reps: 10-15 | Rest: 90 seconds
The hanging leg raise targets the lower region of your rectus abdominis along with your hip flexors. Hanging from a pull-up bar also decompresses your spine, making it an excellent antidote to heavy loading from squats and overhead pressing. It works seamlessly alongside structured upper body routines like our chest, shoulders, and triceps push day workout.
To maximize abdominal activation, do not just lift your legs; tilt your pelvis upward at the top of each rep to flex your lumbar spine.
How to Perform:
- Grip a pull-up bar with an overhand grip, hands shoulder-width apart, and hang freely with arms extended.
- Brace your core and squeeze your legs together.
- Exhale as you lift your legs in a controlled arc until they are parallel to the floor (or higher).
- At the top of the movement, curl your pelvis upward toward your chest to contract your lower abs.
- Pause for one second, then lower your legs slowly over a 3-second count to the starting position.
- Stop all momentum before starting the next rep.
Form Cues:
- Avoid swinging or using momentum; every rep must be slow and deliberate.
- Focus on lifting your pelvis, not just swinging your thighs.
- Depress your shoulders downward away from your ears to engage your lats and stabilize your upper body.
Modifications:
- Beginner: Hanging knee raises or lying reverse crunches on a mat.
- Advanced: Toes-to-bar leg raises or hanging windshield wipers for oblique integration.
Common Mistakes:
- Swinging for momentum: Swinging uses physics instead of muscle power. Reset completely between reps if needed.
- Dropping legs quickly: Fast descents bypass the valuable lowering phase. Lower your legs slowly.
How Body Journey Helps: Log your rep counts and form notes in Body Journey to track your transition from knee raises to strict hanging leg raises.
Exercise 5: Dumbbell Side Plank with Lateral Reach
Sets: 3 | Reps: 8-10 per side | Rest: 60 seconds
Lateral core stability is frequently overlooked in routine design. The side plank trains anti-lateral flexion, strengthening the quadratus lumborum and lateral obliques. Adding a dynamic dumbbell reach challenges shoulder stability while forcing your core to maintain alignment under moving load.
Strong lateral stabilizers keep your pelvis level during running, lunging, and single-leg balance tasks.
How to Perform:
- Lie on your side on a mat, propped up on your bottom forearm with your elbow directly beneath your shoulder.
- Stack your feet on top of each other and hold a light dumbbell in your top hand.
- Lift your hips off the floor until your body forms a straight diagonal line from head to feet.
- Extend your top arm straight up toward the ceiling holding the dumbbell.
- Slowly lower the dumbbell under control across your torso and under your ribs, twisting slightly at your shoulders.
- Reverse the movement to raise the dumbbell back to the top position.
- Complete all reps on one side before switching to the opposite side.
Form Cues:
- Keep your bottom hip lifted high away from the floor throughout the set.
- Maintain a straight line; do not let your hips sag backward or forward.
- Move the dumbbell with control; do not let the weight pull you out of position.
Modifications:
- Beginner: Side plank from knees without added weight.
- Advanced: Elevated foot side plank with hip dips.
Common Mistakes:
- Sagging hips: Letting your bottom hip drop strains your lower back. Keep your glutes engaged.
- Shoulder collapse: Press firmly through your forearm so your shoulder does not crowd your neck.
How Body Journey Helps: Record your weight and balance metrics in Body Journey to maintain symmetrical strength between your left and right obliques.
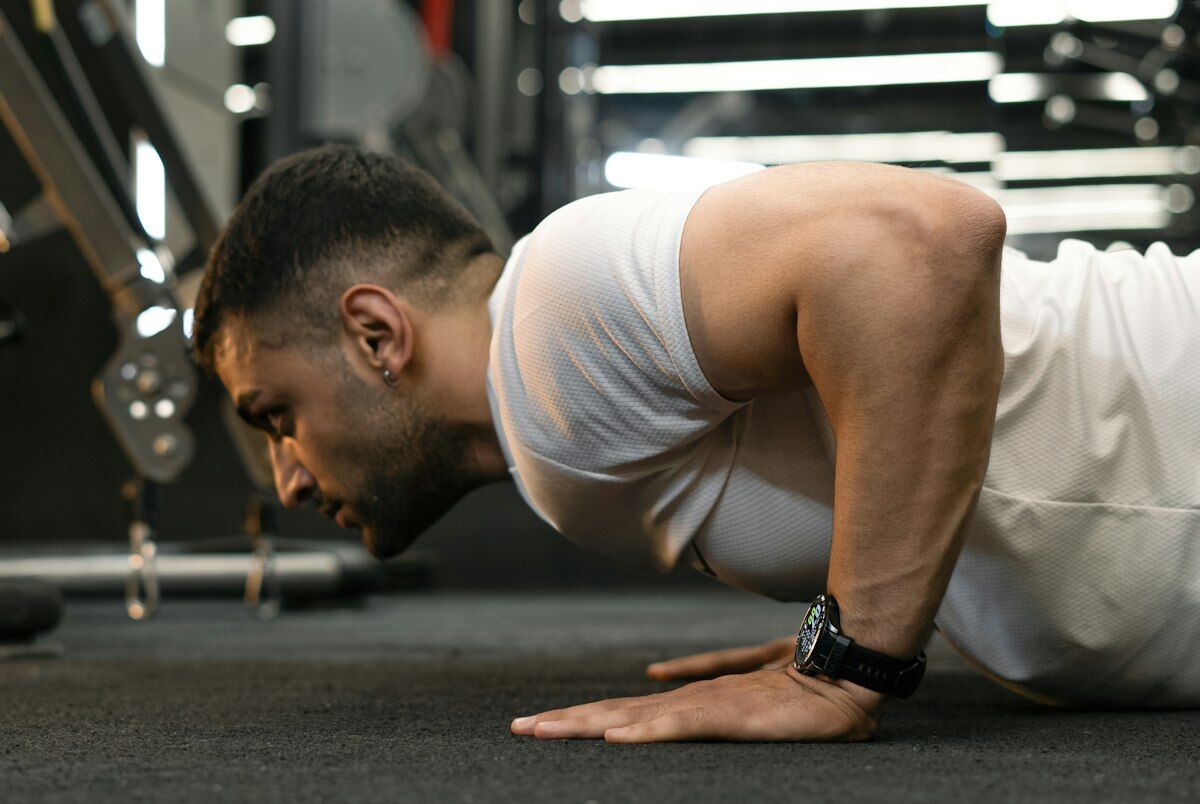
Exercise 6: Weighted Hyperextension (or Supermans)
Sets: 3 | Reps: 12-15 | Rest: 60 to 90 seconds
A complete core strength routine is never complete without addressing the posterior core. The erector spinae and multifidus muscles run along your spine, acting as the structural counterpart to your front abdominals. Weighted hyperextensions strengthen your lower back, glutes, and hamstrings, ensuring your spine is protected from front to back.
Balancing anterior and posterior core strength is key to preventing posture imbalances and chronic back fatigue.
How to Perform:
- Position yourself on a hyperextension bench with your feet secured and upper thighs resting flat against the support pad.
- Hold a light weight plate or dumbbell close against your chest.
- Hinge forward at your waist to lower your torso slowly toward the floor until your lower back is stretched.
- Exhale as you extend your hips and back to raise your torso until your body forms a straight line from head to heels.
- Pause for 2 seconds at the top position, squeezing your lower back and glutes hard.
- Do not hyperextend beyond neutral spine; stop when your body is straight.
- Lower under control and repeat for repetitions.
Form Cues:
- Move smoothly without jerking your body upward.
- Keep the weight hugging your chest throughout the set.
- Stop when your body is straight; never arch excessively backward at the top.
Modifications:
- Beginner: Prone Superman holds lying face down on a mat with no added weight.
- Advanced: Barbell hyperextensions or 3-second isometric holds at top extension.
Common Mistakes:
- Over-arching at top: Hyperextending your spine compresses your spinal discs. Stop at parallel to your legs.
- Using momentum: Bouncing up and down removes tension from the muscles. Keep the tempo strict.
How Body Journey Helps: Log your hyperextension weights in Body Journey. Tracking back extensions alongside abdominal exercises guarantees balanced muscular development.
Cool-Down and Stretching (5 to 10 Minutes)
After completing this intense midsection session, taking time to decompress your spine and stretch your abdominal wall will promote recovery and reduce post-workout stiffness.
- Cobra Stretch: Hold for 45 seconds. Lie face down, place hands under shoulders, and press your chest upward while keeping your hips flat on the floor to stretch your abdominals.
- Child’s Pose: Hold for 60 seconds. Kneel on the floor, sit back on your heels, and reach your arms forward on the mat to stretch your lower back and lats.
- Kneeling Torso Side Stretch: Hold for 45 seconds per side. Kneel tall, reach one arm overhead, and side-bend gently to stretch your obliques and latissimus dorsi.
- Lying Knee-to-Chest Stretch: Hold for 45 seconds per leg. Lie flat on your back, pull one knee into your chest, and hold to release tension in your lower back and glutes.
Progression Strategy
Building real core power requires steady progression over time. You cannot just repeat the same basic exercises week after week and expect continuous results. Use this 8-week periodization strategy to upgrade your core strength systematically:
- Weeks 1 to 2 (Form & Control): Master the form for every exercise. Use bodyweight or light resistance, focusing on strict holds and full control (RIR 2).
- Weeks 3 to 4 (Volume & Density): Add 1 set to your key compound movements (Ab Rollouts and Hanging Leg Raises) or increase isometric holds by 5 seconds per set.
- Weeks 5 to 6 (Resistance Overload): Increase resistance on Pallof presses, side planks, and hyperextensions. Push your sets closer to failure (RIR 1).
- Weeks 7 to 8 (Peak & Deload): In Week 7, test your maximum hold times and rep capacities. In Week 8, cut total volume by 50 percent to allow your spinal stabilizers to recover fully.
Tracking Your Progress: The simplest way to guarantee long-term results is through consistent tracking. Logging your workouts in Body Journey provides clear visual feedback of your strength gains week after week.
Recovery and Frequency
Your core muscles recovery quickly due to their high proportion of endurance fibers, but they still require dedicated rest to repair and adapt. Never train your core to absolute exhaustion right before a heavy squat or deadlift day, as fatigued stabilizers increase your risk of injury.
Space this complete core strength routine 48 hours apart from heavy lower body compound training. Support your recovery with high-quality sleep and adequate hydration.
Body Journey Tip: Log your daily recovery notes and muscle readiness in the Body Journey app before starting your training sessions.
Frequently Asked Questions About Your Core Strength Routine
How often should I perform this complete core strength routine?
Performing this routine 2 to 3 times per week is ideal for most lifters. You can do it as a standalone 45-minute workout or split the exercises across your existing training days.
Will this routine help me burn belly fat and get six-pack abs?
This routine builds the thick, dense muscle structure of your midsection. However, visible abs require a low body fat percentage achieved through a proper nutrition plan and calorie control.
Can I do this core workout if I have mild lower back pain?
Yes, because this routine prioritizes anti-extension and anti-rotation, it helps protect your spine. However, always start with the beginner modifications and consult a doctor if you experience sharp pain.
Is it better to train core before or after my main workout?
Always train your core after your main compound lifts. If you fatigue your core first, your spine will lack stability during heavy squats, deadlifts, and overhead presses.
The Bottom Line
A strong core is the ultimate insurance policy for your strength, athleticism, and long-term joint health. By training anti-extension, anti-rotation, and posterior stability in a single comprehensive routine, you build a functional midsection that looks great and performs even better. Stay consistent, execute every rep with intent, and watch your total body performance skyrocket.
Start Your Transformation Today
Ready to build an unbreakable core and take control of your fitness? Download Body Journey today to log your workouts, track your progressive overload, and visualize your progress step by step. Download Body Journey now and start building your best body today.